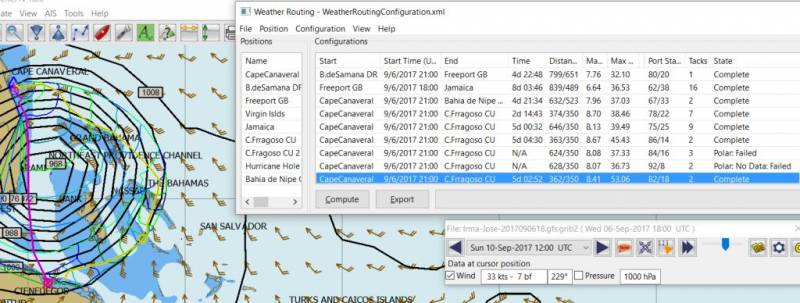
Irma Hurricane Examples
Five Configurations that will Compute
Confirm that the Weather_Routing Plugin has been installed.
Files & Pathnames
It is important that you use this configuration for Windows (Linux use comparable User accessible directories):
-
Main Path for support files: C:\ProgramData\opencpn\plugins\weather_routing
-
WeatherRoutingConfiguration.xml: C:\ProgramData\opencpn\plugins\weather_routing
-
Polar Files (.pol,.txt,.csv): C:\ProgramData\opencpn\plugins\weather_routing\polars
-
Boat.Xml Files: C:\ProgramData\opencpn\plugins\weather_routing\boat
-
Grib-Sample File: C:\ProgramData\opencpn\plugins\weather_routing\grib-sample
Weather_routing installation may not create these files in the correct location, and may put them under
-
C:\Program Files (x86)\opencpn\plugins\weather_routing/data
If this is the case, just download the Weather Routing Setup files below and install as shown above.
Weather Routing Setup Files
Download and Unzip files and directories to C:\ProgramData\opencpn\plugins\weather_routing
Unzip and install files & directories into C:\ProgramData\opencpn\plugins\weather_routing to follow the locations above. These files will provide you with sample files to help learn how to weather_route.
Run some Weather Routing Routes
-
Start Climatology_pi, although it will start automatically if called.
-
Start Grib_pi and open the Irma-Jose-2017090618.gfs.grib2 file.
-
This file is located in C:\ProgramData\opencpn\plugins\weather_routing\grib-sample
-
or just copy it to your normal grib file location.
-
-
Set the Grib Date to Wed, Sept 6 2017, UTC 21:00 and get the screen centered on the grib.
-
Then open Weather_routing_pi.
-
you may be pointing at the wrong directory, so Pick "File > Open" and browse to
-
C:\ProgramData\opencpn\plugins\weather_routing
-
Then select and open "WeatherRoutingConfiguration.xml".
-
-
Confirm the "Boat section" path is correct as shown above in the Pathname list.
-
Confirm the "Polar" path is correct as shown above in the Pathname list.
-
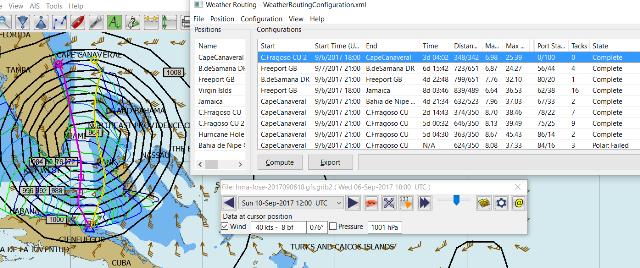
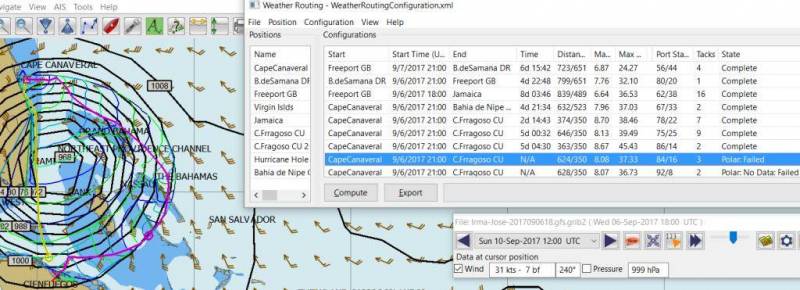
In the menu you should find 5 configurations for routes in the Caribbean.
-
Pick a route configuration and then select Compute from the bottom of the menu.
-
Check that the isobars and route is drawn.
-
Then step through the Grib_pi:
-
Changing the time to see where the boat is located and how the wind changes.
-
-
Try Computing the other routes.
-
Notice how the Configuration settings have been changed.
-
Notice what files are being used.
-
-
Once you are pretty confident about this, go to the next step.
-
Which is to create your own configurations.
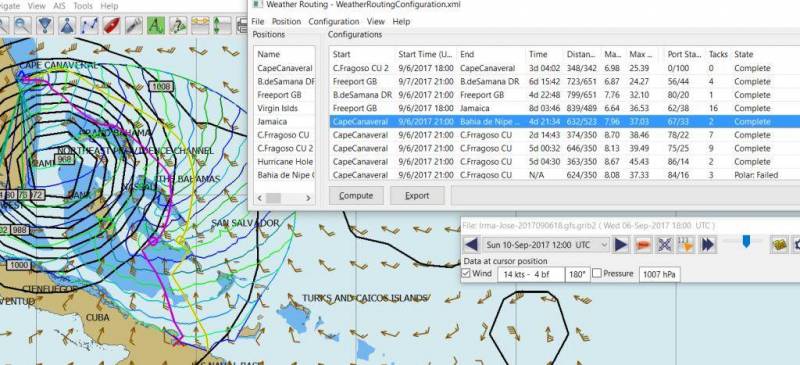
Computation of 5 Routes
These are 5 Weather Routings in "Weather-Routing-Setup" that should Complete when using the small grib file for hurricane Irma.
Weather_routing would not normally be used for this weather, as it is time to haul, however in emergency situations it could be used to develop avoidance measures by setting conservative maximum wind speeds in your configuration.
These routings below do find circuitous avoidance routes based upon their Configuration values, but the values could be made even more conservative. The purpose of these examples is to illustrate the dependence of Completed routings on a number of values and constraints.
When a routing Fails, the user needs to learn and understand what values need to be adjusted. Adjustment of Time Interval is just one of the settings to be considered in Weather Route Configuration.
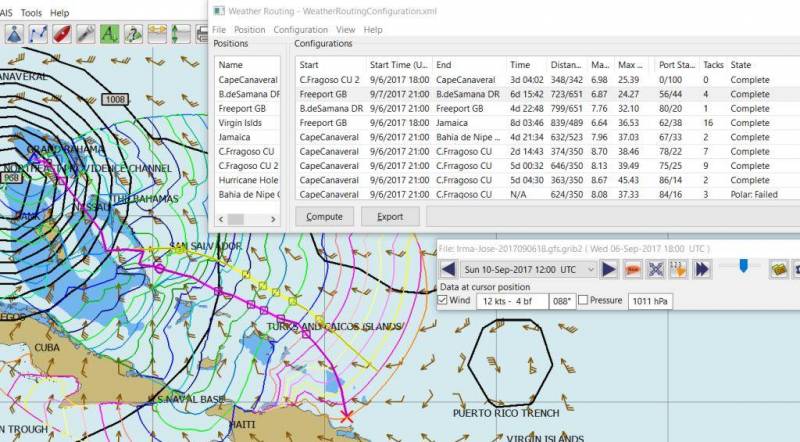
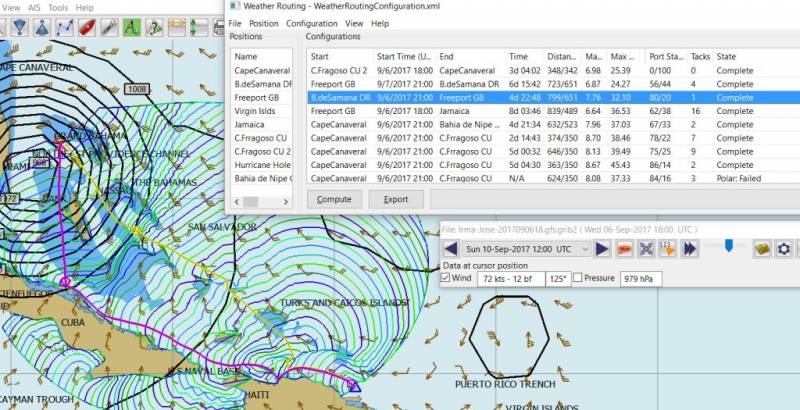
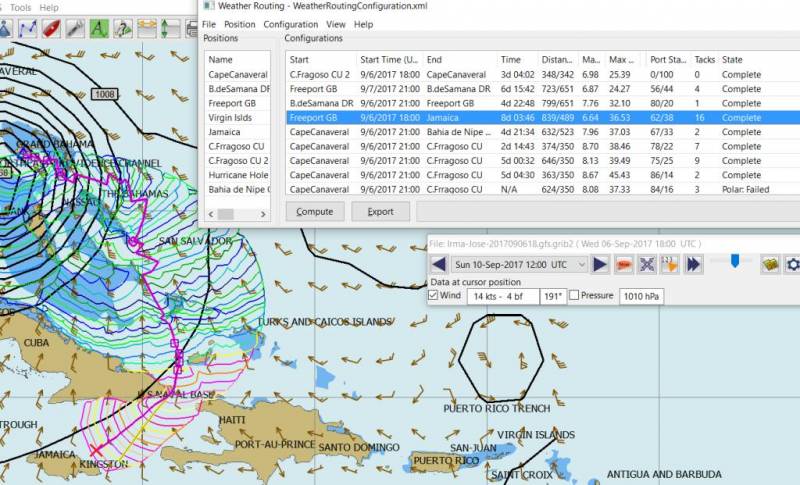
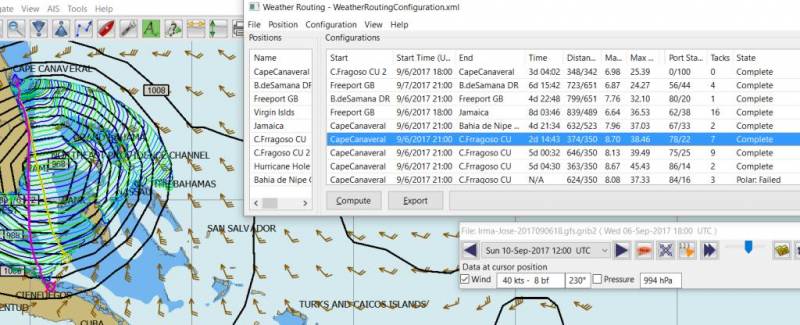
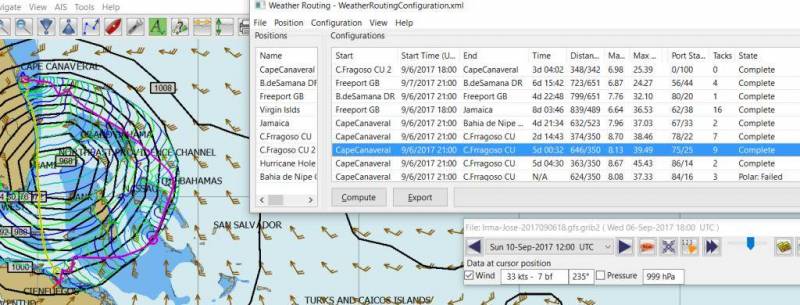
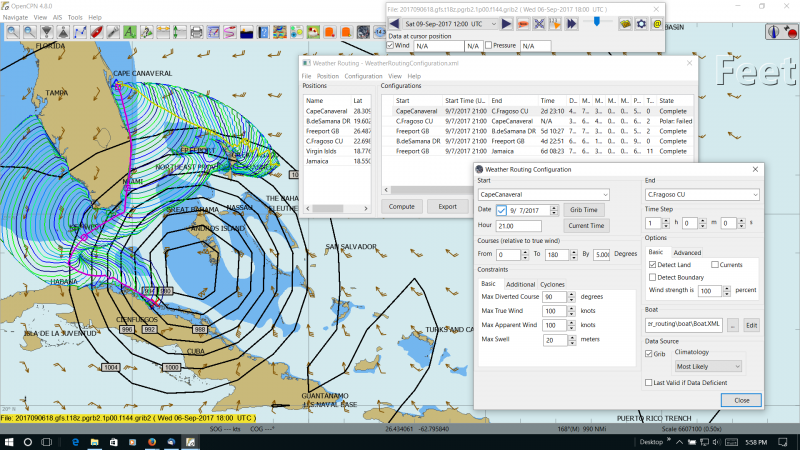
Computation of Routes from Cape Canaveral with different Intervals
These routes are also in “Weather-Routing-Setup Zip Files” and illustrate how different Time Intervals may interact with Land causing Failures depending on the configuration of the Finish point with land masses. Notice that Cape Canaveral 4 & 5 (4 & 5 hour Time Intervals) both Failed.
Changing to a smaller Time Interval is a reasonable response to help Complete and so is changing the Default Max Diverted Course from 100 to 150 degrees, both of which require more computation. The other alternative is to use a different Weather Routing Position for the Finish, which is further away from the interfering land masses.
Note that the optimum weather route that is computed changes with the Time Interval due to interaction with Land mass at the edges of the Wind data. Choosing Finish points that are clear from Land Masses, Smaller Time Intervals and greater Max Diverted Course will generally help in these cases.
The very different routes taken with each time interval all result in Trip times of 5days-1/2hr to 5days-4-1/2hrs which are quite small differences given the divergent routes. In planning your trips you may want to take advantage of these alternatives which are shown with use of different Time Intervals, depending on your goals.
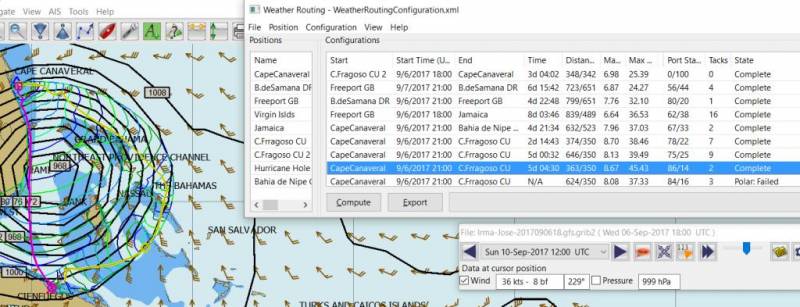
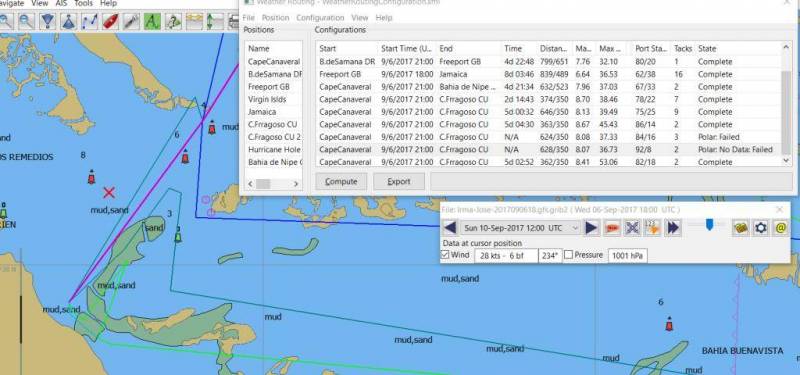
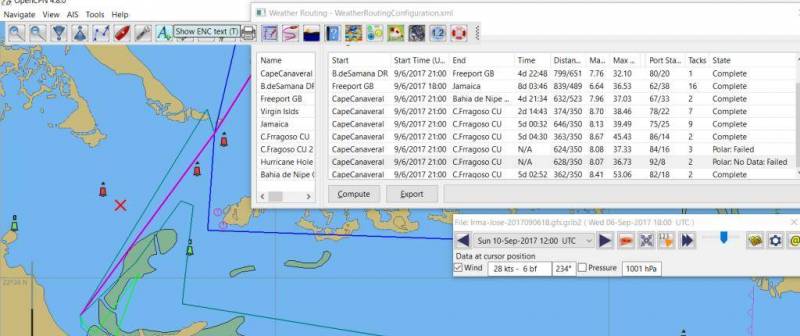
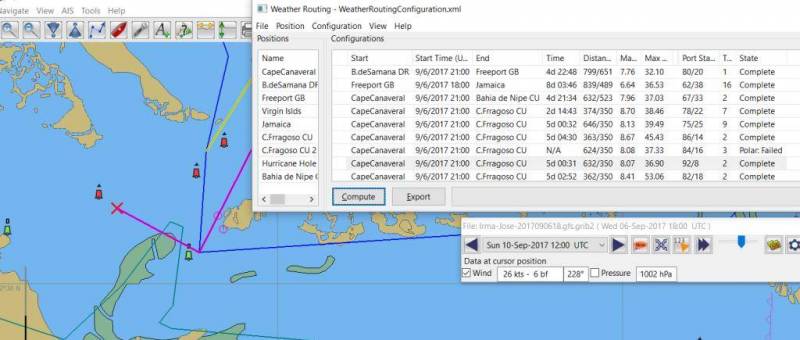
When there is a Compute Failure try to understand why. Zoom in to where the routing is failing, to see and determine that the Time Interval or Destination Point is not right or too close at the complex land - sea interface. Then change the Time Interval or move the Destination Point further out to sea where the routing calculations can be made more easily. This is just one configuration consideration, there are others.
Here is a good example of “Avoidance Routing” around Irma. The polars could be made more conservative (and should be), and the routing will probably “fail” which would be a warning that a better “weather window” is needed. Time to prepare for the hurricane rather than running weather-routings!. Avoidance of Irma into the Gulf and along Florida Shore.
WR Not a substitute for sound judgment & realistic goals
Why try to route into Irma? You must Configure weather_routing to match your sound judgment and realistic goals. You are in control, use your own judgement when you review the results. This cannot be emphasized enough. Weather_Routing_pi is just a tool in your hands, you are in control.